***
***
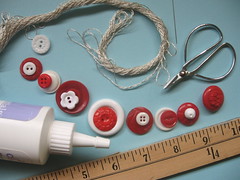
What you need:
Embroidery Floss- (I used
DMC® Metallic Embroidery Floss)
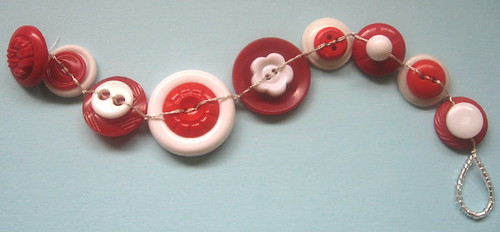
assorted buttons (any kind)
glue
scissors
ruler
2 -Light-medium twisted beading needles (you may not need these)I make my bracelets roughly 7-8 inches long. You may want to measure your favorite bracelet to get a better length for you.
1. Cut off a 1 yard piece of embroidery floss. Put a dab of glue on each end and twist each end to a point and allow to dry. This will give ou a semi-rigid “needle” for threading through the buttons. If this doesn’t work for you, you can use a beading needle to thread your buttons.
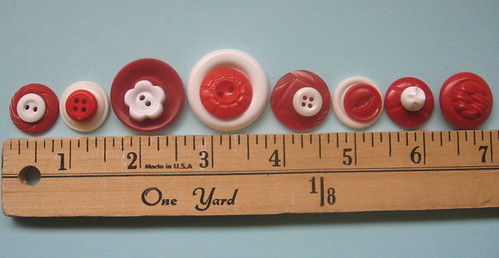
2. Arrange the buttons you will be using in a 7 inch line with small spaces(1/16) in between each button.
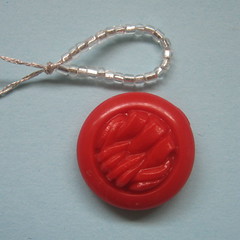
3. Take embroidery floss, fold in half, make a loop (big enough for last button to fit through) and tie a knot. You can add seed beads first to make latching on/off easier.
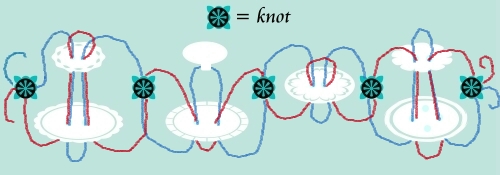
4. You will have two ends of the string in which you will weave in and out through the buttons in opposing directions. This keeps the button from twisting and flipping over. Use the following diagram.
5. Weave one button at time, knotting in between each button making sure to tug tightly on the thread, until you get to the last buttons.
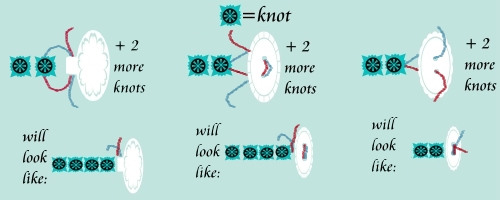
6. There are 3 options for finishing off the last button.
For option 1 and 2 you will be taking the thread through the button then finishing it off with two knots directly behind the button right next to the first two knots. For the third option, you will just take the thread through the button holes and do a double knot on top of the button. Trim the excess thread and add a dab of glue to keep knots together.
I never realized how hard it is to make a tutorial! Kudos to all of those lovely crafters that do this kind of thing often. I hope that my tutorial makes sense. If you have any questions please leave them in the comments or send me an email (regina AT creativekismet DOT com)
On a side note, I just wanted to thank everyone so much for all of the extremely nice comments that have been left on my posts -especially on the two previous posts. I’d love to send one lucky person the above bracelet or this green/yellow shell bracelet (your choice). Just leave a comment (and a note on which bracelet you like best) and I’ll draw one name on Friday. Thanks so much everyone!
Wow! Thanks for all the great coments, once again. I’m having a super busy day today and will be drawing the name of the winner late tonight (central time) and posting the winner first thing in the morning. The winner will also be notified via email. Thanks  http://blog.creativekismet.com/2006/07/03/button-bracelet-tutorial/
0 komentar:
Posting Komentar