Day 5 of Anthro Necklace Week!

This is our last tutorial post of the week!
If you’ve missed any of the tutorials – check the sidebar. There are links to each tutorial.
A bit of business – tomorrow the giveaway posts will go up.
Five Posts – one for each necklace. I felt like that was easiest because you might not like all the necklaces – so this way you can enter for the necklaces you do like.
(Don’t forget Christmas Gifts though!!)
Also, on Sunday, I’m going to put up a linky and a link to a Flickr group so that you can add the necklaces you make!
I’ll keep links to that page on my sidebar so you can find it easily later.
I’ll also be featuring a few necklaces that have been sent to me – already!!! Are you amazed and impressed?? I am. ;)
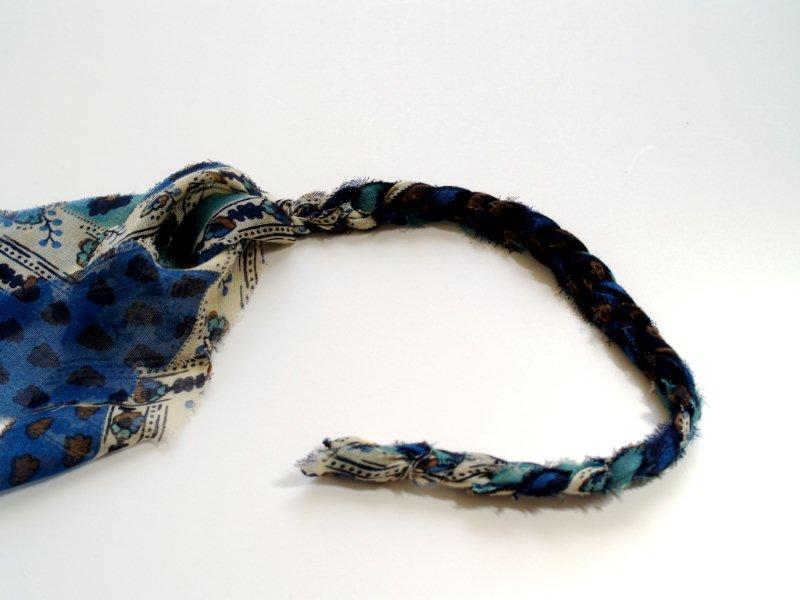
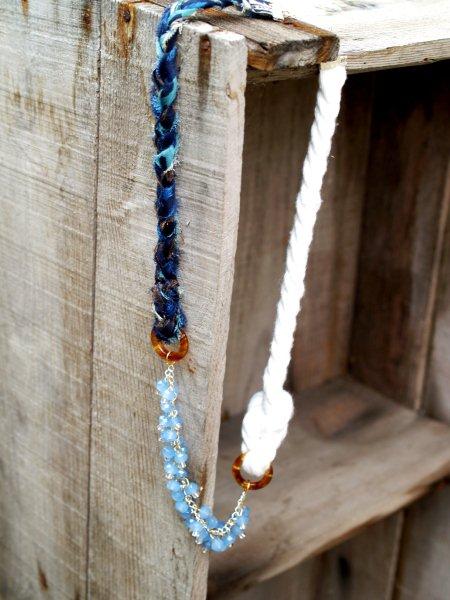
Today we’re making the Set Ashore Necklace.
The beauty of this design is that it is sooo adaptable. You can change out each element to your preference or supply availability!
So fun and so many possibilities.
So fun and so many possibilities.
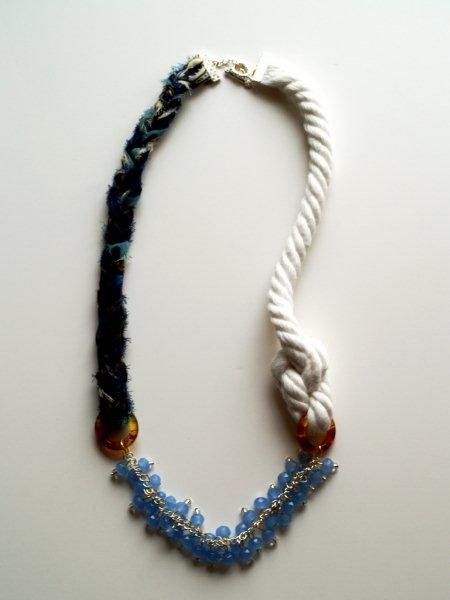
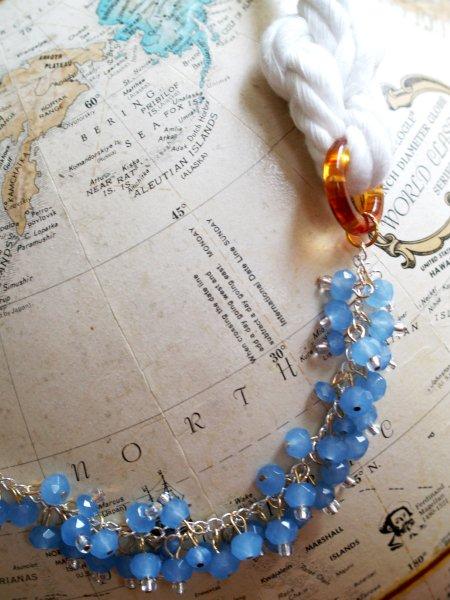
Here’s Mine:
And here’s the inspiration:
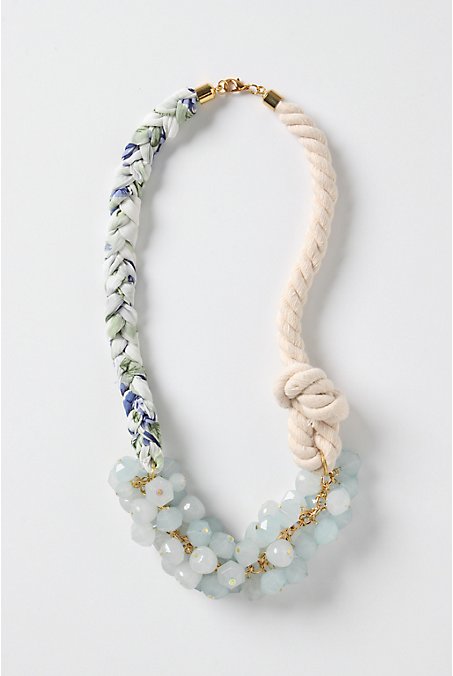
Tough to get a background that shows up the blue and the white well.
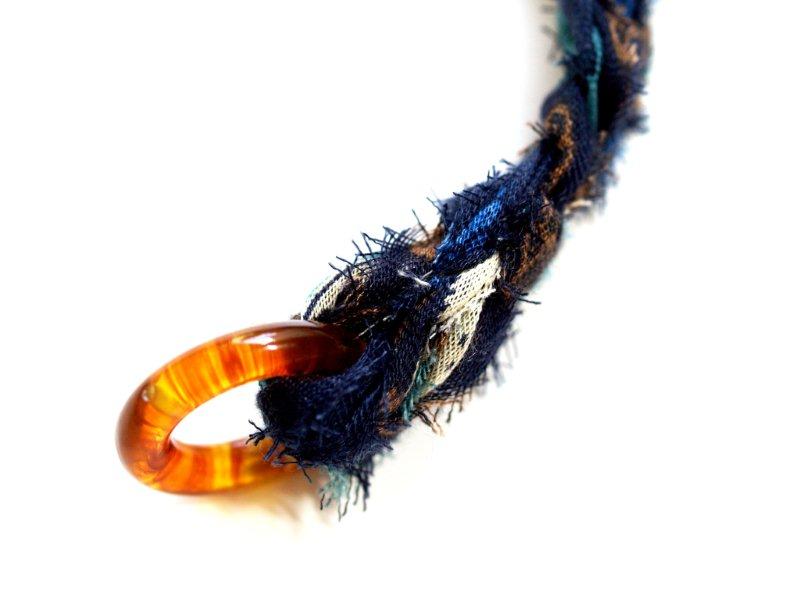
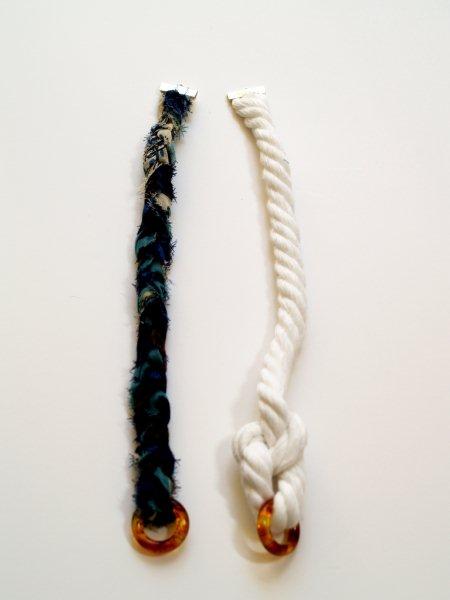
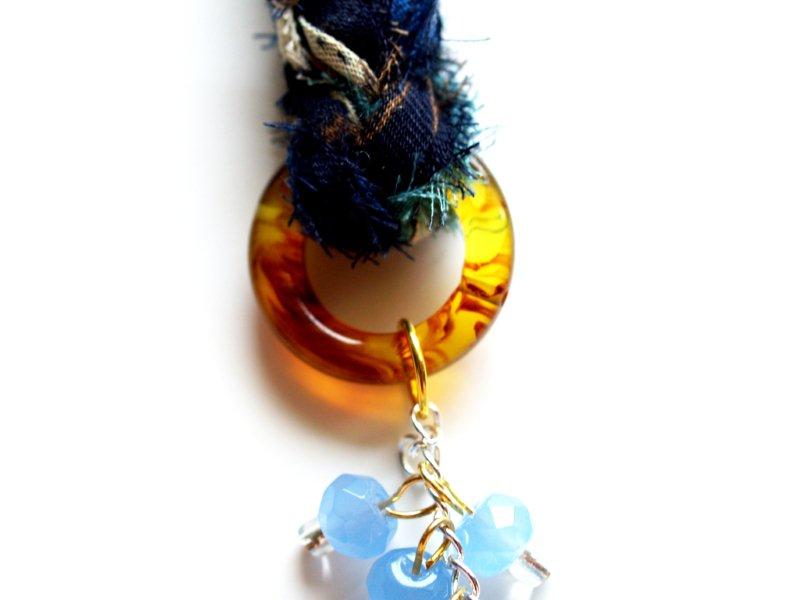
I used scarf fabric from the Paisley Rebirth Necklace and added some funky rings. I also used an assortment of gold and silver findings to mix it up a little.
Here’s what you’ll need for the Set Ashore Necklace!
Materials:
- Wire Cutters
- Needle Nose Pliers
- Round Nose Pliers
Supplies:
- Cotton Cording – Around12″
- Fabric for braiding – I used 3 pieces 36″ long (folded in half) x 1 1/2″ wide
- Chain – 8″ (Cut into a 7 /2″ piece and a 1/2″ inch piece)
- Beads (Assortment – I used most of 3 bead strands)
- Headpins – (enough for one per bead)
- Large Rings – 2
- Jump Rings – 5
- Toggle Closure
- Ribbon Clamps or Large Cording ends
- Super Glue
- Needle & Thread

Let’s get started!
Cut your fabric strips. I doubled mine -as I noted in the supply list. If you fabric is a cotton or heavier weight, you wouldn’t need to do this.
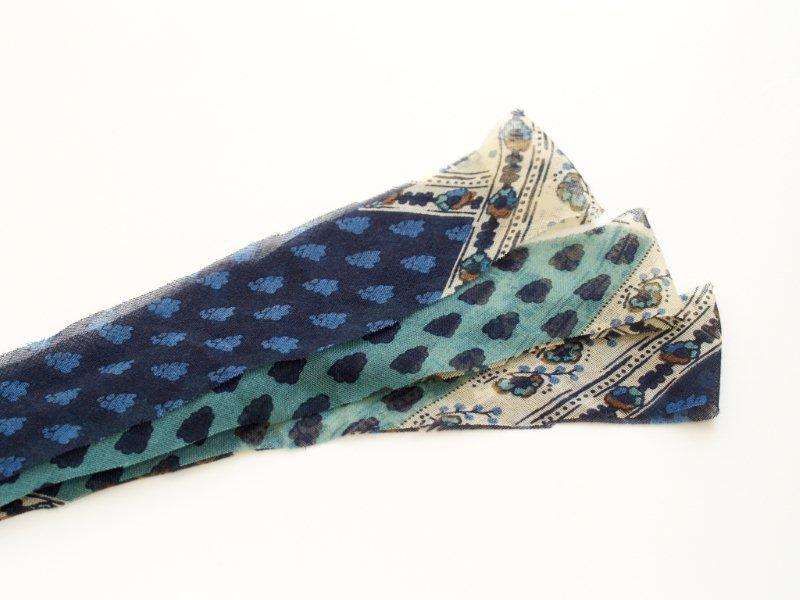
Sew the three strips together at the fold with a few small stitches.
I love the raw edges of the braid – but if you don’t like that, you can fold the ends under, or sew tubes of fabric for your strips.
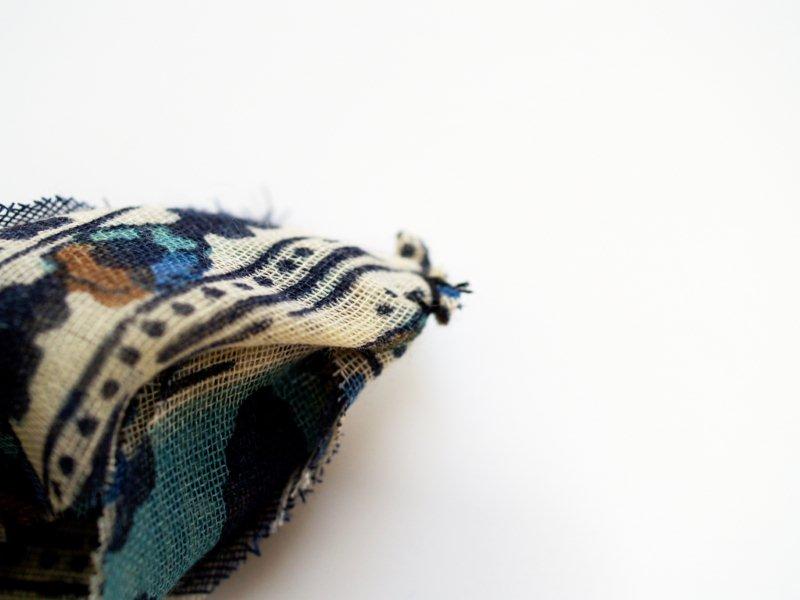
Braid the strips together loosely until you have about 11″ of braid.
At the top of the braid, where your stitches are, put the ribbon clamp. If you need to, open it a little wider with your pliers.
Make sure all the top ends are inside the clamp and with the needle nose pliers, clamp the teeth around the braid.
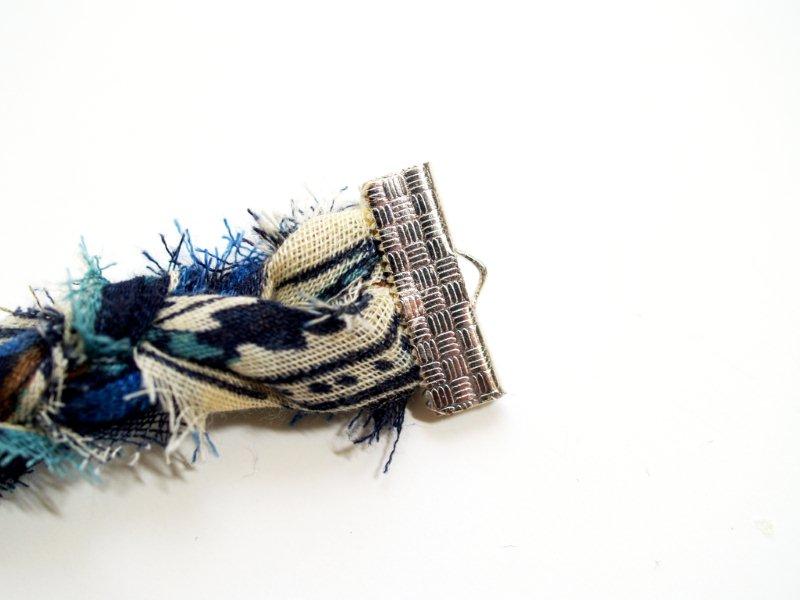
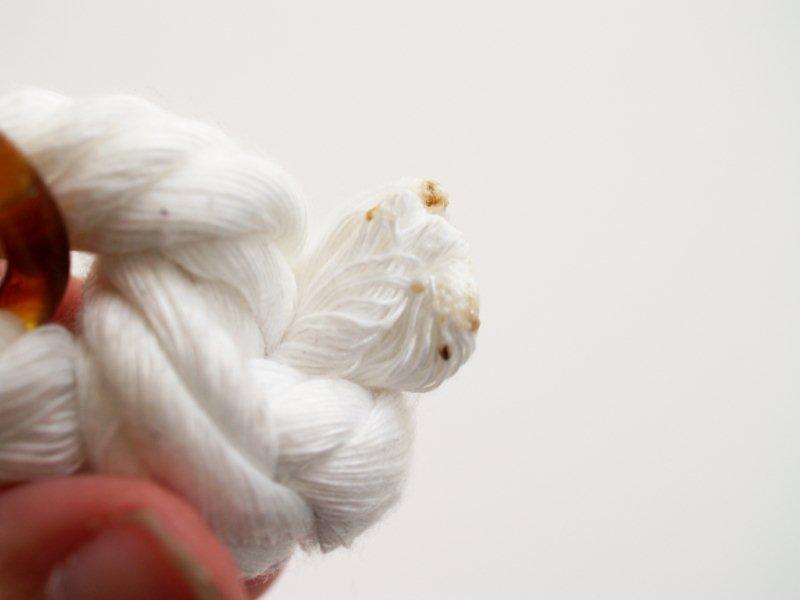
Trim off the ends that aren’t braided and feed the braid through the large bead ring. Turn the end under and sew the braid to itself.
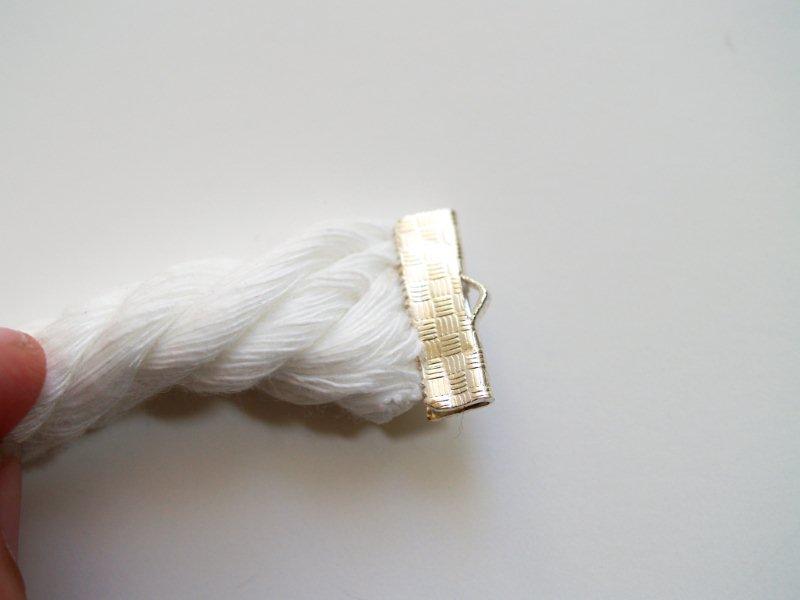
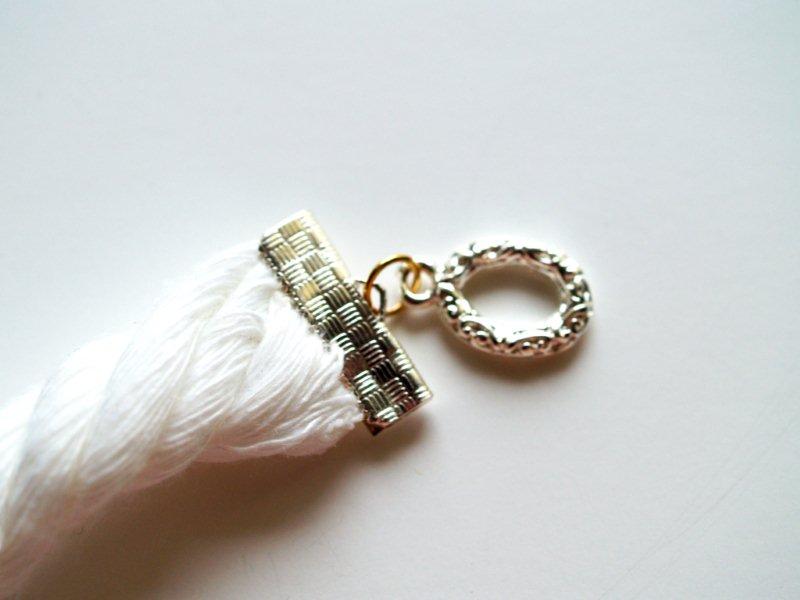
Set this part aside for now. For the cording, burn the cotton at one end, just a bit.
Put the burnt end in a ribbon clamp like you did for the braid and clamp it closed.
Feed the other end of the cording through a large bead ring, then knot the cording to itself. Measure the length of this side against the braid and make sure they’re the same.
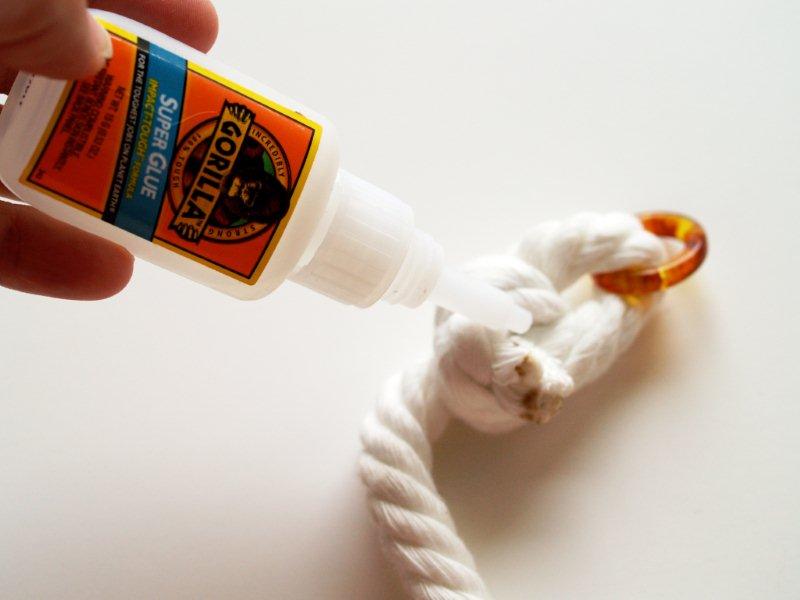
Trim the cord close to the knot. Burn the ends of this just a bit.
Add a bit of super glue to the end of the knot to help it lay flat against the knot.
Great! The two strands of the necklace are finished.
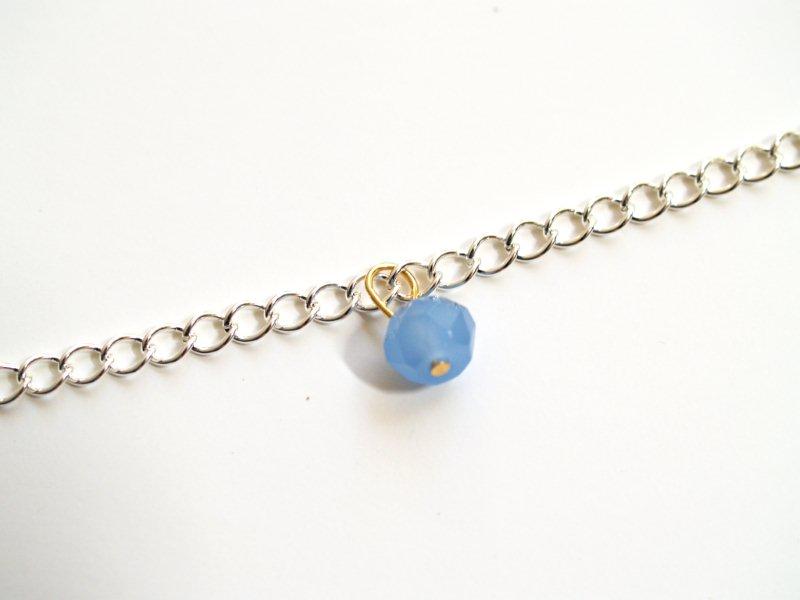
Start making your bead/head pin loops for the chain portion. Those of you that have been visiting all week (Bless You) can recite this with me.
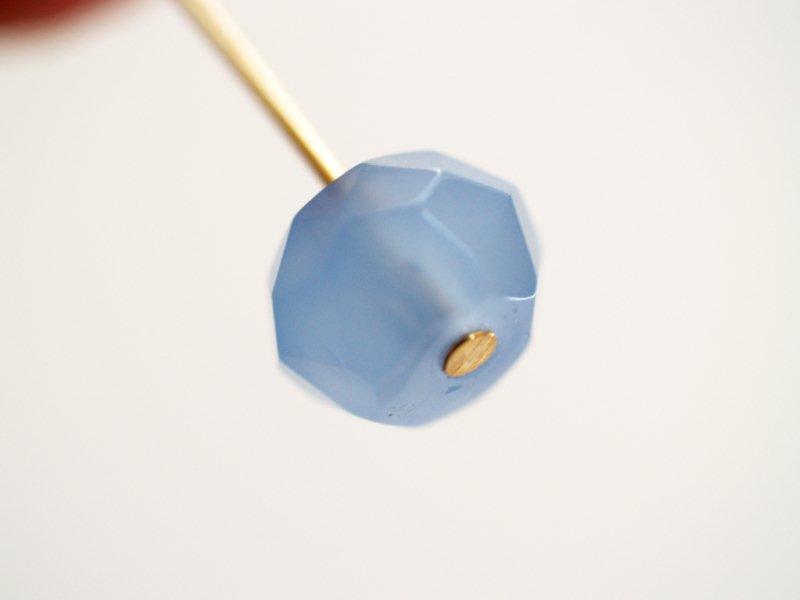
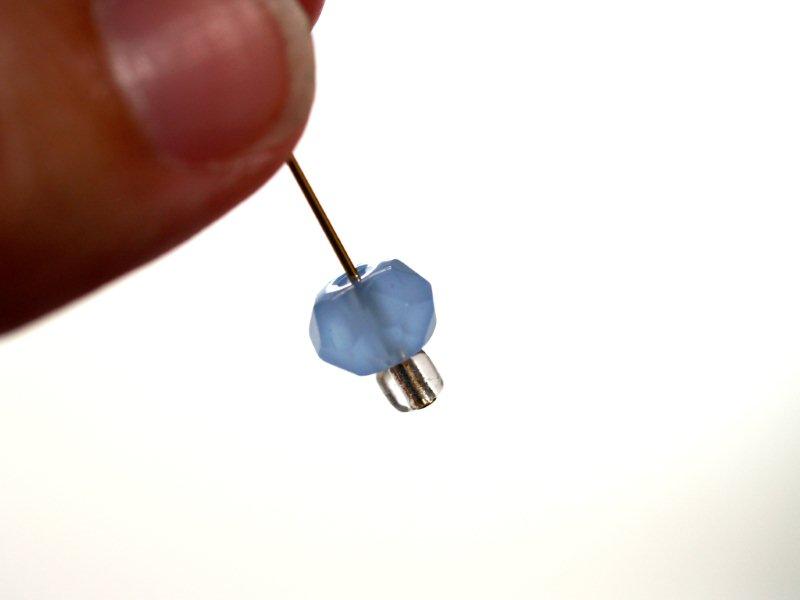
Place the bead on the head pin. (A piece of cut wire with a flat end to hold the bead on)
If your beads slip off the head pin, add a small spacer bead at the bottom. In this one bead strand, I had some that fit and some that didn’t. So I just mixed it up a bit and used both.
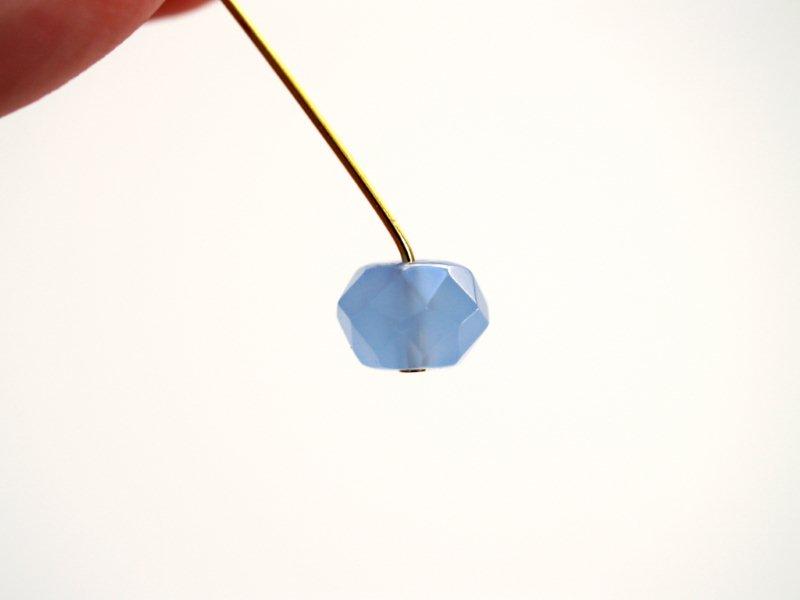
Bend the wire at a slight angle.
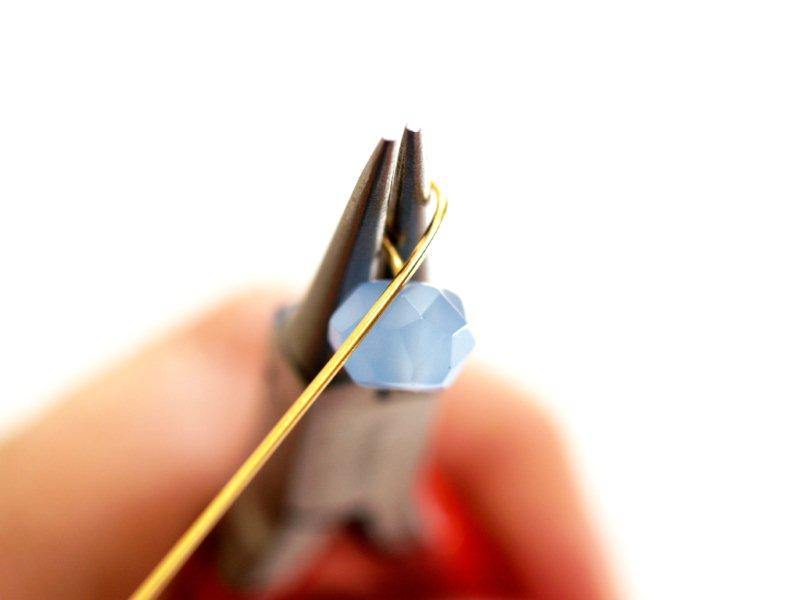
Wrap the wire around one side of your round nose pliers.
Trim off the wire where they overlap. Everybody: “Point the wire cutters away from you”.
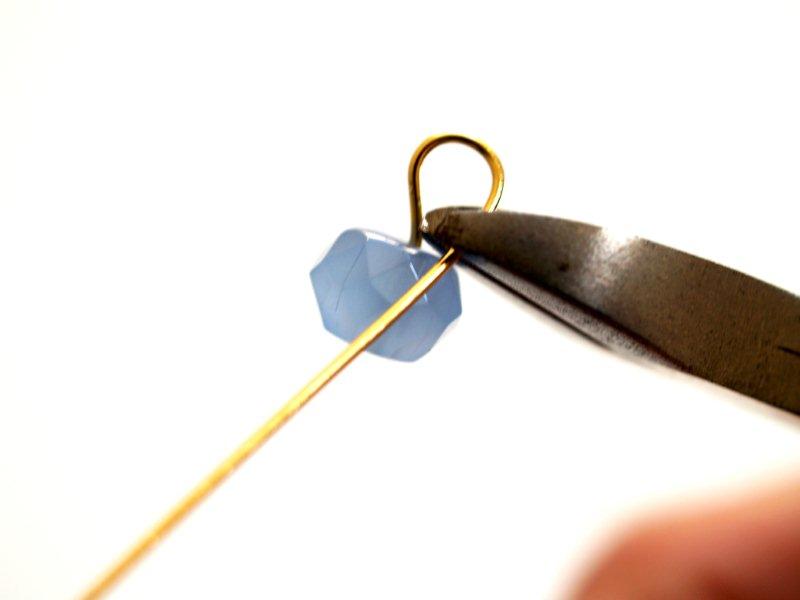
At this point you can close up the loop the rest of the way, and make all your beads at once.
Or you can just add it straight to the 7 1/2″ chain, then close the loop.
Continue adding beads to the chain. Make sure every link but one on each end has a bead. (You might want to choose a chain with open holes – it will make this step easier.)
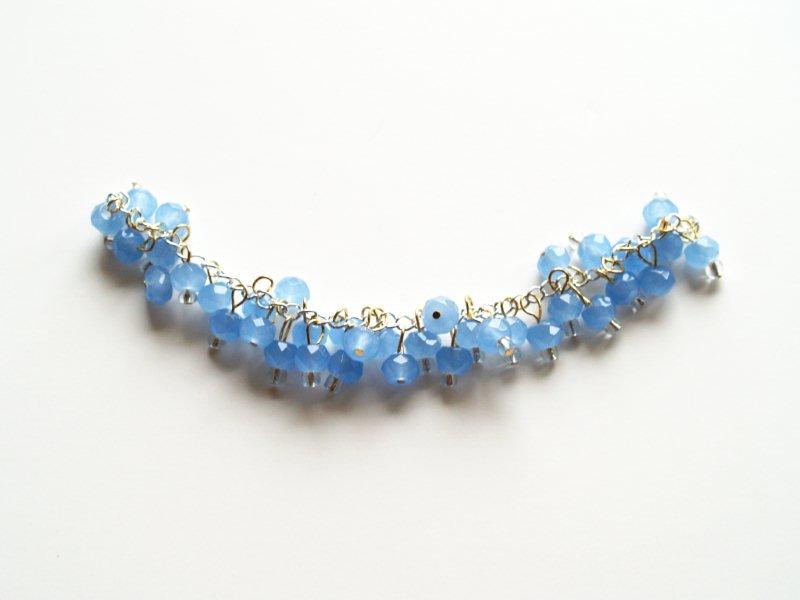
Once every link has a bead, go back through and add a few more, until your chain looks full. You can mix it up and use different sized beads too.

Whew. You should be a bead and head pin expert now!!
Add a large jump ring to one end of the chain and add the large bead ring attached to the cotton cording to that. Close up the ring.
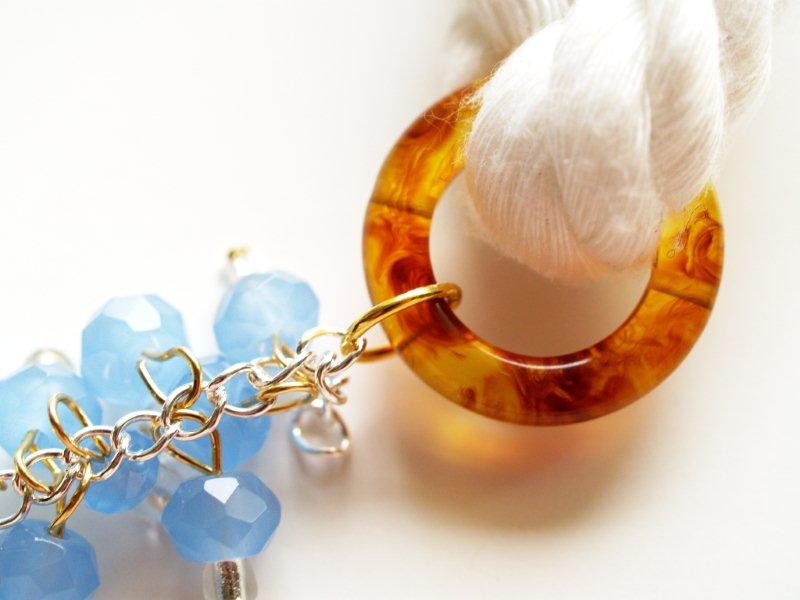
Repeat with the other end of the chain and the ring on the braid.
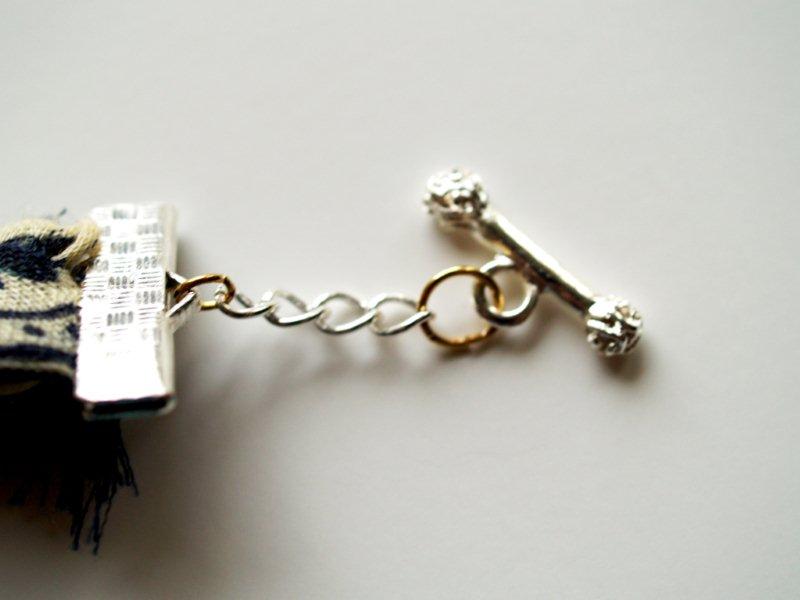
Attach a small jump ring to the ribbon clamp on the cording and add the open end of the toggle clasp to it. Close up the ring.
Add a small jump ring to the ribbon clasp on the braid, then add your 1/2″ piece of chain. Close the ring.
At the other end of the chain add another small jump ring and add to that the bar of the toggle clasp. Close the ring.
(This chain helps the toggle bar fit through the toggle ring. If it’s not there – you can’t get it through because of the ribbon clamp. Trust me.)
(This chain helps the toggle bar fit through the toggle ring. If it’s not there – you can’t get it through because of the ribbon clamp. Trust me.)
Necklace Number Five is Finished!!
So fun and unique.
Our last “Anthro” shots of the week.
I have had so much fun. Maybe we should do this annually – what do you think??

0 komentar:
Posting Komentar